Monday, February 13, 2012

Steam gained

Now that the hull has been completed, this busy beaver of sorts has been toiling away at creating all the flair that will tie the canoe together, literally and figuratively. Seats have been fitted, bulkheads and decks installed, thwart and yoke partially carved. Doesn't sound like much, but I assure you these seemingly benign tasks have filled my days of the last week with much sweat and curses, sharp results and small moments of immense satisfaction. Though it has been an exhilarating process getting to this point, it also presents a very distinct light at the end of the tunnel. I've planned since the get go to be finished by the end of February, and by all appearances I may actually be ahead of schedule. Certainly hate to see this project end, but there will indubitably be a continuous stream of joy to come from this. Can't wait to get paddling!

Since many small but fairly significant processes have been accomplished since the last post, I'm going to go light on the verbiage (hooray?) and heavy on the picturage for this post. After all, admit it, we all read the pictures first, whether it be some unassuming blog, your favourite kid's book (Good Night Moon!), or the latest issue of the New Yorker.

I do, however, wish to mention one thing about the decks. Eschewing the walnut I had originally planned on using, I built these with some cherry wood that had been milled from some old orchard cherry trees belonging to Brian, to whom I am already indebted for the use of his garage for this project. Being old and gnarled wood, the grain pattern is really variable and beautiful. I managed to book match pieces for both decks, to that the wood figure is essentially mirrored with symmetry, which frankly just looks pretty damn cool. Not to mention the boat now contains a very unique part of this valley and community in which it is being built, something I will treasure for time.

In honour of the Hallmark holiday of the month tomorrow, I leave you with this old proverb:

"Love many, trust few, and always paddle your own canoe."


Scupper blocks glued and sealed, ready for install.

More clamping fun! Inwales get epoxied on.

Stern bulkhead installed. Though the main purpose of bulkheads in a canoe are to create airtight chambers for increasing the buoyancy of the craft, as well as adding a little extra strength to the long hull, I also added a deck plate in the stern for accessing a little extra storage space when need be. Nevermind the tape and clamps at top, though they certainly wouldn't be rectifying an error or anything like that...


Seats all finished up and ready to go. I used your standard military issue nylon parachute cord  and wove it with  the a traditional snowshoe pattern. The process of tying these up was a fun diversion for a few nights, even granting me admission to a true-to-form stitch 'n bitch session. Why do these up this way you ask? Aside from lending  a deeper hue to the old-fashioned whimsy of a wooden boat, I figured the less holes or slots drilled into them (which seemingly would create myriad opportunities for water to waltz in and set decay) the better, and so settled on the knotted approach. Time will tell if they actually are comfortable. For now and until it's on the water, it's all about good looks, baby.


Bow seat getting fitted at the right height and angle.


Carved thwart of cherry (isn't that a Maldovian dish?) . It is a pure pleasure to the work fine, graceful lines with a spokeshave, I must say. 


Rear deck fitted and installed. The cool curly grain of the orchard cherry will really become apparent once it's varnished. But you get a sense of it's potential at this point.


And finally, the outwales are screwed into place and rounded off at the ends. I elected to forgo the epoxy on these, to make future repairs and replacements easier. A lot of people have asked me if I was going to cap over the cedar hull, a well-accepted good idea by all accounts. I however, really like the aesthetic of contrasting colored lines, and feel it gives the boat a flowing and lithe character.

Monday, February 6, 2012

Hup hup, a hull is whole!

After a brief journey of respite to the fresh rains and faces of Vancouver, I've returned to my quaint life in the Similkameen recharged and ready for the second push. Before I left, and since I last left you all with the last entry, I managed to round up another sucker, er, willing helping hand for the fiberglass job in the inner hull. No matter how you cut it, this process is eased immensely with some help, and I've been extremely grateful to have it. So far, the only remittance required for such help has been a pledge for some paddle time once we're water-borne. Fair deal say I!

It's almost a bittersweet deal to be finished with the fiberglass stage now - such a monumental learning event, not to mention being critical to the whole structure. The more I worked with it, the more I grew to appreciate and relish the amazingness that is epoxy. Civilizations could be built with the stuff, it's that good. Not the most straight forward or dummy proof material, as I certainly left a barely tolerable amount of oopsies and goofs thanks to my amateur status as epoxy artisan, but with some practice you can do some pretty neato stuff with it, with good looking results. If (when) I build the next small craft (any takers?), I know now what works and what just makes a royal mess. Hopefully. 

Finding the ash wood for the gunwales proved to be most difficult, but eventually I was able to source something. (Mental exercise: Say gunnel, but envision large marine mammals toting assorted firearms in some underwater gangster scene. Now laugh at that sheer absurdity!). I suppose the lesson here is: don't build boats in the desert. Seems straight forward enough, yet here I am... The 10 foot long board was ripped into gunnel width strips, and then scarfed together to create 20 foot or so heavy wooden noodles. Ideally full length pieces would be used here, but again, I refer you to the beginning of this paragraph. Making due with whatever options exist. One way or another, this thing will float and look pretty good doing it, and only I will know each fault and funky trait built into her. We're just tight like that.

Once ripped and scarfed (sounds like an assault from knitting needle-wielding betties), the scuppers were located and, yes, epoxied on. As mentioned in a previous post, scrap pieces of cedar planking were used, except where the seats and thwarts are to be fashioned, in which case I used bigger scuppers of stronger walnut. This is a slow going process, as each of the 25 scuppers on each gunnel requires it's own clamp. Thanks to the abundance of cheap plastic one-off tools available at your local Cambodian Tire, I now own just enough clamps to glue up one gunnel/scupper assembly at a time (and subsequently one assembly to the hull at a time).

Which brings us all to the here and now. Work continues on the seats in the downtime, where after much sanding, routering, and varnishing, I'm now learning the very cool and traditional looking snowshoe weave for the seat innards. It's also an infuriating and curse-inducing lesson in knot management that requires constant detanglement, untwisting, recoiling, rethinking, reconnoitering, so don't be fooled into imagining little old Sean in his chair, craftily tying knots with pleasure and whimsy. Regardless, I did manage to get myself invited to the next stitch'n'bitch session, so perhaps the knotting process in not all for naught.

Inner hull glassed, gunnels scarfed together. 

Holy crap, THAT'S A LOT OF CLAMPS!! Scuppers on!

Wednesday, January 25, 2012

Keepin' on

Perhaps some of you may be wondering by now if I quit or left the game, having not posted anything in a while. I am here to reassure you, however, that work has continued, albeit at a slightly more lackadaisical pace. Fairing of the interior of the hull has blessedly been finished, after many hours of shoulder-burning, patience-testing scraping, sanding, sanding and scraping at all manners of awkward angles. The task of finding a willing second set of hands for the impending fiberglassing has proven a bit more tedious than the prior session, being that most of the prior help is now out of town.

So in the meantime, I've managed to make a whole mess of scuppers and two bulkhead panels from the leftover cedar planking. I cut the scuppers using the drill press, in order to get a nice curved end profile on each piece, with the intention of creating nice symmetrical ovals along the length of the inwales. Scuppers are a natural result of building traditional wood canvas canoes, the construction of which requires the hull be built upon a skeleton of horizontal ribs. The inwales are then secured to the inner face of the ribs, with the spaces between the ribs thus creating the scuppered effect. On a cedar strip canoe, they aren't necessary for constructive purposes, but rather lend a "traditional" look which I still prefer to a solid inwale. More importantly, though, is their useful functions of saving a bit of weight, providing lash down points, and allowing water to drain out when the canoe is dry docked upside down. Standing water on wood is bad juju, and scuppers are the golden antidote.

I've debated some about whether to add bulkheads (sealed compartments) at either end of the canoe, but for now they win out. Adding a little extra buoyancy and strength to a canoe of this length really is a no-brainer now that I really think about it; in the event of a capsize, it'll make it that much easier to recover and not be totally swamped. Also, the bow and stern of this design are a little on the short side (think in contrast to a canoe with the big, curved ends), and so to me seem they would be prone to taking on more water when traversing big waves. Having a little more lift at the ends would, in my theory, help keep the nose up and out of the water as the canoe descends one wave and into the next. Makes sense to me enough to do it! I'm considering adding some kind of watertight hatch, so the space inside can still be utilized for stowing a few essential items in times of lesser duress.

I've also taken the first step into the trim work, cutting and assembling the seat frames. I've been eagerly anticipating this moment, but have put it on hold until now for fear of getting ahead of myself and working myself out of a job, so to speak. I decided to make the seats from cherry, merely for the fact I love its appearance and workability, and also that it was on sale. I used good ol' fashioned mortise and tenon joints to join the seats together, the strongest and cleanest joint for this application. For being my first real stab at creating this type of joint, I was rather pleased to find they came out straight and tight fitting.

The fiberglass on the inner hull is going on tomorrow hopefully, and after a couple days for that to set up, it'll finally be time to go full bore into turning a floppy hull into a tailored, lean and mean lake-cruising machine. Actually, it's not a machine at all, nor is it likely to be lean (this won't be any passe, no-frills vessel), but you get my point of enthusiasm.

Finally on the right side of up! 

Bulkhead panels, a heap o' scuppers, and plans to boot.
Mortise and tenons, hopefully with the wherewithal to withstand a bum or two.

Wednesday, January 11, 2012

Glassed!

After many hours of nervous hand-wringing and countless hypothetical what-ifs passing through my mind, the fiberglass layup for the outer hull has been a success. Huzzah for that. Turns out it wasn't such a hard thing to do, but being a noob at the whole process, it turned out far from perfect, but nothing I can't absolutely live with. Watching the many hues and gradations of texture and color come to life under the shiny epoxy was exhilarating - finally a true sense of what the craft will look like in real life! 

I was extremely fortunate and grateful to have the assistance of  a couple friends, who willingly placed themselves in a potentially ooey gluey situation. By our powers combined, stress was diminished and the job went quickly and smoothly. 

Three coats of epoxy covered the 6oz. weight fiberglass cloth, which turns translucent once wetted out. Should be enough to keep everything together and me from sinking once water-borne. I'll let it set up and cure for a couple days, then it'll be time to lift it off the forms and set it right side up for the first time. Who knows what lurks underneath? I'm a little afraid to find out, but again, nothing a little epoxy gooyiness can't help.

Colors are really popping now. 
She shines!

Hull glassed, lungs and eyes safe, and at least one thumb accounted for. All makes for a good day.


Friday, January 6, 2012

Blossom

I guess I'm rolling with a plant life theme for my post titles; can't say why, but it is ironic in that the canoe is being built from dead cedar. Not that I feel guilty about that. I suppose it is akin to labeling free range animal protein "happy meat," even though I'm sure said animals would not be very happy at their end result, on my plate and in my belly. Something for our conscience. But I digress.

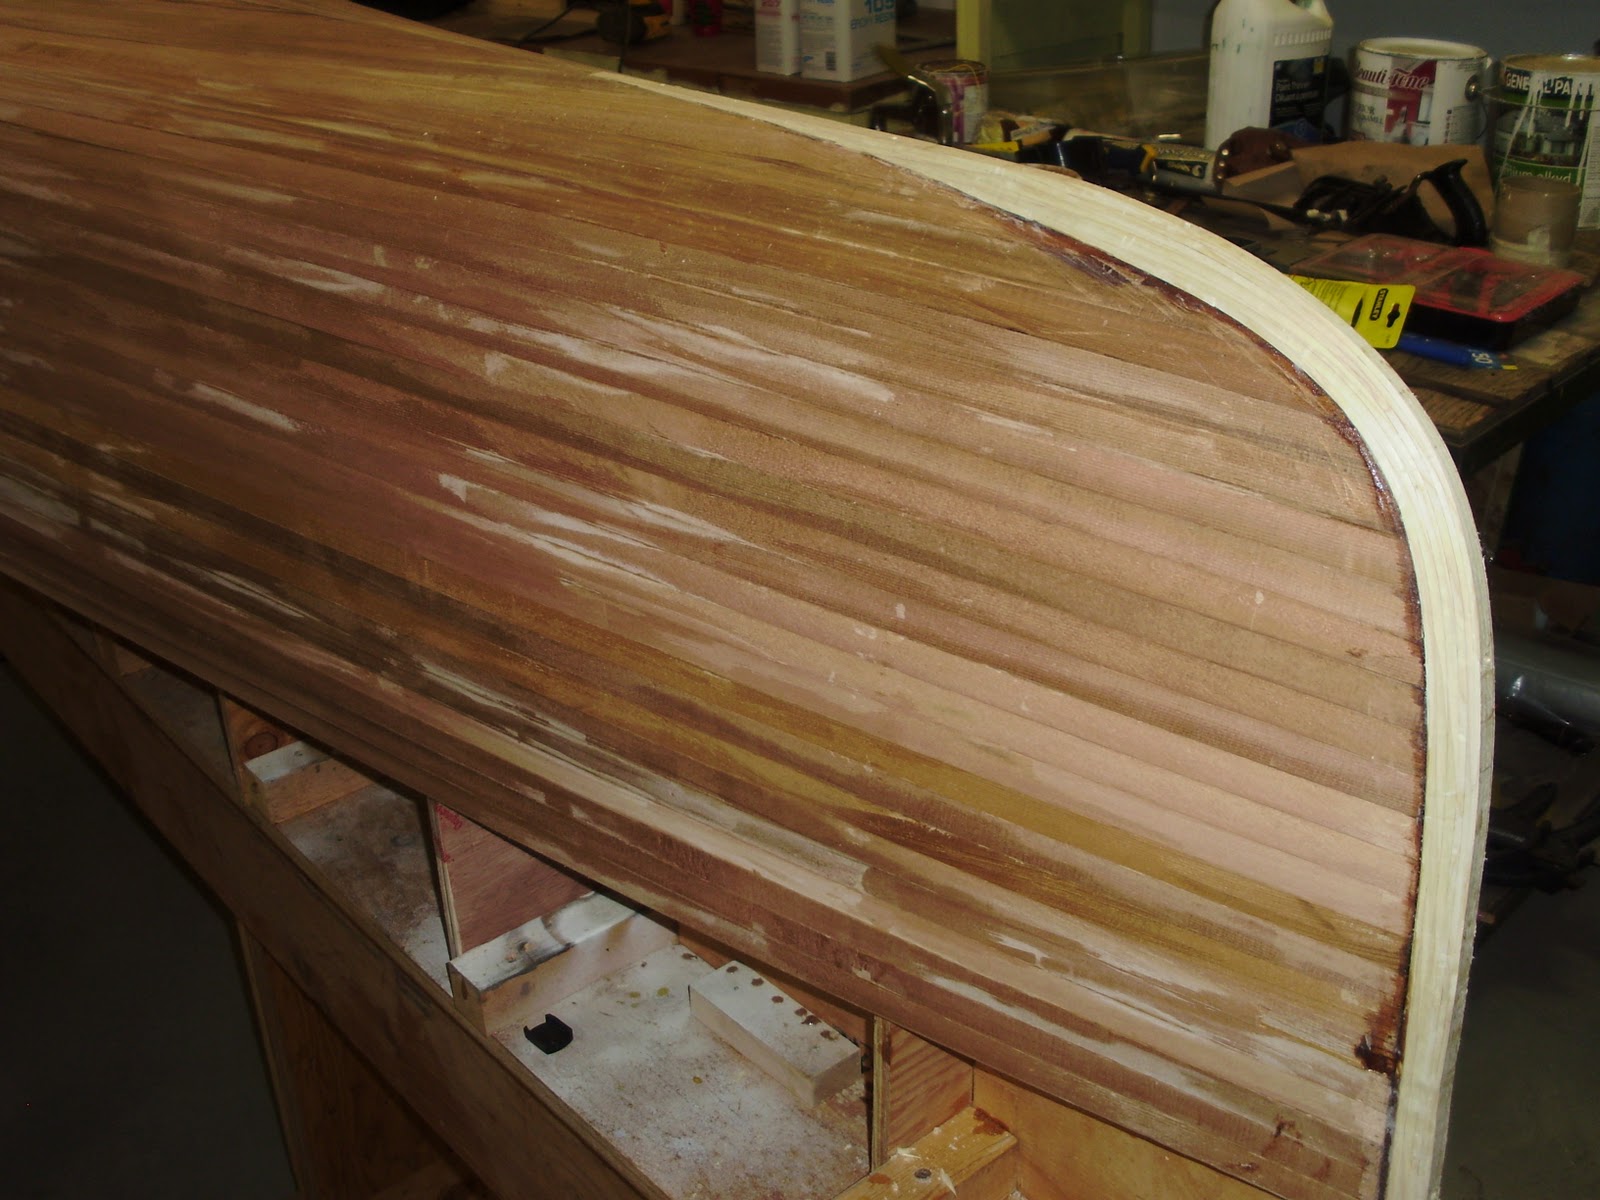
As you may have surmised from the title, the canoe hull has taken full form! The planking process was quick and straight forward, that is until I got to adding in the last pieces of the aforementioned 'football.' At that point, each strip must be angled, beveled, and cut to length EXACTLY, lest the canoe be fraught with wonky gaps and ill-advised holes. Nothing a little epoxy goop can't effectively fix, but that's hardly a mark of good craftmanship. However, I managed with only minimal cursing and re-cutting pieces to fit, and I am generally pleased with the results. A good thing too, as only one strip and some change remain, so had I bungled many more pieces I would have had to start adding ugly little chunks and bits to round out the hull.

Stems were then glued on to the ends with epoxy goop, more or less straight, and subsequently shaped into the fine lines of the hull. Seems simple enough, yet somehow this step took an entire afternoon. Maybe not unusual, but I already find myself reassessing my estimated time needed to finish almost every day.

Once all the glue had set between the planks, I set to task pulling the 9,352 staples that were holding everything down. Talk about a boring task, but it is one that requires attention nonetheless, lest I smash and dent the wood underneath each staple.

Staples removed, I then moved onto faring the hull with a block plane to remove all the high points between the planks. Maybe it was due to immediately following the extremely monotonous staple pulling, but I found much pleasure in this step, and hated when it was all over. If you've ever had the pleasure of taking fine shavings off of wood with a freshly honed plane, you can relate. For those that haven't, you really must try once even if you never hand plane wood again. The fresh zipping sound, the smell of freshly cut cedar, the smooth flowing motion of moving the plane across the hull, the curl of paper thin wood fiber separating and falling harmlessly to the floor, and the sanded-smooth finish it leaves behind, all conspire to a simple yet immensely satisfying task.

Unfortunately, what follows this is sanding, and lots of it. Messy, noisy, somewhat toxic, and boring. And essential. Which is where I am at, and I will not write on that any more, because that's about all there is to it. In light of the copious amounts of airborne cedar dust about to be created, I was forced (yes, forced) to shave my beard so the respirator would seal to my face. A necessary and acceptable casualty of the process I suppose. I could have spent a cool 300 bucks on a powered respirator that seals off one's entire noggin (and looks a little goofy in the process), but I realized I'm just not that attached to any one beard, so the choice was easy. But fear not, it will grow back once the breathing hazards have passed.

I've worked some long hours every day since I've been back to get to this point, so with only a day's worth of preparing the hull for the big fiberglass, I think I'll take a day or two to get canoes off my mind. Harder done that said, but better results are often achieved, in my experience, from walking away for a stint, and coming back at it with renewed vigor and fresh ideas. So here's to that, and be on the lookout for the next post, post-glassing. That's when things will get real. And shiny.

Ready to take a pounding on the killer surf. Or not. Maybe gentle sandy beach landings would be a better idea.

Hull complete, stems added and shaped. 

Saturday, December 31, 2011

A Seed Germinates

Back at it now after the Christmas hiatus. Before heading to the homeland for the holidays, I had pretty much everything set to fly once I got back, anticipating a Christmas cookie-fueled burst of initiative and ardency.

True to my plan, cookies and all, I stepped into the shop three days ago, admittedly feeling a bit giddy for the big moment. I set to work right away laying the first planks, thus marking the time of conception for the fledgling vessel. (So I've got babies on the brain, so what? My sister just announced her first tadpole, so there). This is really the bread and butter segment of this sort of canoe construction, when vision becomes reality. This is also the most monotonous step of the way (sanding giving it a run for its money, though), but the progress made is constant and the growing canoe hull keeps begging for more.

Planking also presents an opportunity to work in any kind of design or artistic bent, should one choose to do so. Sounds cool and all, but from the start I've envisioned a more subdued scheme that would turn more of the focus to the boat's lines and hardwood trim. However, the color of cedar is notoriously variable, even within a single board, so I tried to at least make the planks look arranged on purpose. Even had I just tossed them on haphazardly, it's still a cedar canoe - kind of difficult to ruin that, though I have been witness to one or two hideous jobs (how did they manage to do THAT?).

Planking continued along merrily, until I reached "the football" stage (a technical term, but still apt in any case, if you know me). This is basically the bottom of the boat, where the planks get successively shorter and are no longer able to attach to the stems. As the ends of every plank will have to be trimmed back to the exact (!) keel line, I continue up one side only while making sure to select correspondingly colored pieces, marking them and setting aside for a bit later.

Which brings me to the now, and all of you up to date, and hopefully all of us over our nog and jolly-time hangovers, real or perceived. Here's to more joy and wisdom to be had by all in the New Year.

I'll leave you with some sage wisdom from the writer Sarah Knowles Bolton:

"Upon life's seas, to yourself be true, And, whatever your lot may be, always paddle your own canoe." 


The stripping begins.


The aforementioned so-called football.
Working up one side of the bottom. The strips will be planed off along the keel line, and the matching  opposite pieces will be laid in.

Monday, December 19, 2011

Finally underway!

After considerable effort in procuring the building materials, and generally getting my life in a semblance of order, I'm finally taking the first steps towards realizing my dream (or one of many dreams, at least). It feels like it has taken much too long to get here, but I am happy to be at task anyway.

Building the forms and the strongback is a critical and time-consuming process, but proper attention to detail will ensure a straight and clean-lined vessel. I elected to forgo this part of the process however, allowing my somewhat limited free time to be allocated to the actual building of the boat. I was fortunate to find a kindly chap who had just finished building his own, and was willing to sell his forms and strongback to me (thanks Dean!). These sort of things tend to get passed along unless you are a professional, or at least a habitual, boat builder. After all, what could you possibly repurpose a set of round shaped plywood pieces and a 20 foot long beam on legs set at knee level? I was thankful for the excuse to drive the 4 hours to Nelson to pick it up, as I was able to visit a number of friends in the area whom I hadn't seen a while. The strongback, being strapped upside down on top of my truck, garnered many puzzled looks from passers by, and more than a few "What the hell is that thing?" comments from interested folks.

Since I wasn't dead set on any one specific design, I was more than happy to adopt the design Dean had chosen for his. As such, I will be building a 17'9" Freedom, designed by the well-known yacht and canoe designer Steve Killing, and is one of the offerings from Bear Mountain Boats, the source of all things wooden canoe (not the only one, but probably the best known one). It is more of a modern design, as opposed to the more frequently observed traditional and native designs, with relatively vertical stems with little curvature (i.e. less sideways wind resistance). The bow is more narrow than traditional canoes, with the widest point located aft (behind) of the center of the boat, making this particular boat a fast one. The size is relatively large, but I'm building this with the intention of using it, lots. Going far and long, big loads and all. And ample room for the beer cooler, lest ye be without proper hydration. Perhaps I'll build a smaller boat for day trips and fun, once this hobby becomes an obsession!

Set up was a snap thanks to all of Dean's prior hard work, save for a couple new forms that had to be built, and a general check to make sure everything was plumb and straight. The stems, the first pieces of the boat to be dealt with, were steamed in a jerry-rigged contraption consisting of a PVC tube (originally, and likely still is, my fishing rod depository), an antique jerry can, some washing machine hose, and my good ol' trusty camp stove. Once properly bent and dried over the stem molds, the narrow laminations were epoxied together and re-clamped over the stem molds again. These pieces will provide the attachment points for the cedar strips later on, and really are a vital component of the canoe's structure. Western red cedar was used for the inner stems (for weight savings and workability), and white ash for the outers (for durability and color scheme).


Stem laminations getting glued up and clamped down.
Everything set up and underway.